逆向工程搭建
在人人开源里面下载:
1
2
3
4
5
6
7
8
9
10
11
12
13
14
| git clone https://gitee.com/renrenio/renren-generator.git
下载到桌面后,同样把里面的.git文件删除,然后移动到我们IDEA项目目录中,同样配置好pom.xml(root)
<modules>
<module>gulimall-coupon</module>
<module>gulimall-member</module>
<module>gulimall-order</module>
<module>gulimall-product</module>
<module>gulimall-ware</module>
<module>renren-fast</module>
<module>renren-generator</module>
</modules>
|
1
2
3
4
5
6
7
8
9
10
11
12
13
14
| 修改renren-generator的application.yml
url: jdbc:mysql://192.168.106.100:3306/gulimall-pms?useUnicode=true&characterEncoding=UTF-8&useSSL=false&serverTimezone=Asia/Shanghai
username: root
password: Zlw199805
修改generator.properties
mainPath=com.zlw
package=com.zlw.gulimall
moduleName=product
author=zlw
email=1253143088@qq.com
tablePrefix=pms_
如果写了表前缀,每一张表对于的javaBean就不会添加前缀了
|
1
2
3
4
5
| 运行RenrenApplication,访问http://localhost:80
然后点击全部,点击生成代码。下载了压缩包
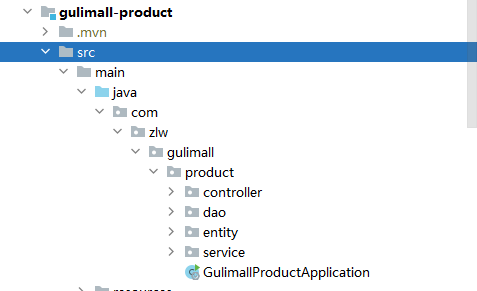
解压压缩包,把main放到gulimall-product的同级目录下。
|
1
2
3
4
5
6
7
8
9
10
11
12
13
14
15
16
17
18
19
20
21
22
23
24
25
26
27
28
29
30
31
32
33
34
35
36
37
38
39
40
41
42
43
44
45
46
47
48
| 然后在项目上右击(在项目上右击很重要)new modules— maven—然后在name上输入gulimall-common。
在pom.xml中也自动添加了<module>gulimall-common</module>
<?xml version="1.0" encoding="UTF-8"?>
<project xmlns="http://maven.apache.org/POM/4.0.0"
xmlns:xsi="http://www.w3.org/2001/XMLSchema-instance"
xsi:schemaLocation="http://maven.apache.org/POM/4.0.0 http://maven.apache.org/xsd/maven-4.0.0.xsd">
<parent>
<artifactId>gulimall</artifactId>
<groupId>com.zlw.gulimall</groupId>
<version>0.0.1-SNAPSHOT</version>
</parent>
<modelVersion>4.0.0</modelVersion>
<artifactId>gulimall-common</artifactId>
<description>每个微服务公共得依赖,bean,工具类等</description>
<properties>
<maven.compiler.source>8</maven.compiler.source>
<maven.compiler.target>8</maven.compiler.target>
</properties>
<dependencies>
<!-- mybatisPLUS-->
<dependency>
<groupId>com.baomidou</groupId>
<artifactId>mybatis-plus-boot-starter</artifactId>
<version>LATEST</version>
</dependency>
<!--简化实体类,用@Data代替getset方法-->
<dependency>
<groupId>org.projectlombok</groupId>
<artifactId>lombok</artifactId>
<version>1.18.8</version>
</dependency>
<!-- httpcomponent包https://mvnrepository.com/artifact/org.apache.httpcomponents/httpcore -->
<dependency>
<groupId>org.apache.httpcomponents</groupId>
<artifactId>httpcore</artifactId>
<version>4.4.13</version>
</dependency>
<dependency>
<groupId>commons-lang</groupId>
<artifactId>commons-lang</artifactId>
<version>2.6</version>
</dependency>
</dependencies>
</project>
|
1
2
3
4
5
6
7
| 然后在product项目中的pom.xml中加入下面内容
<dependency>
<groupId>com.atguigu.gulimall</groupId>
<artifactId>gulimall-common</artifactId>
<version>0.0.1-SNAPSHOT</version>
</dependency>
|
1
2
3
4
5
6
7
8
9
10
11
12
13
14
15
16
17
18
| 复制
renren-fast----utils包下的Query和PageUtils、R、Constant复制到common项目的java/com.yxj.common.utils下
把@RequiresPermissions这些注解掉,因为是shiro的
复制renren-fast中的xss包粘贴到common的java/com.yxj.common目录下。
还复制了exception文件夹,对应的位置关系自己观察一下就行
注释掉product项目下类中的//import org.apache.shiro.authz.annotation.RequiresPermissions;,他是shiro的东西
注释renren-generator\src\main\resources\template/Controller中所有的
总之什么报错就去renren-fast里面找。
|
测试
测试之前先整合一下商品服务里面得mybatis-plus
整合mybatis-plus:
(1)导入依赖:
1
2
3
4
5
6
| <!-- mybatisPLUS-->
<dependency>
<groupId>com.baomidou</groupId>
<artifactId>mybatis-plus-boot-starter</artifactId>
<version>LATEST</version>
</dependency>
|
(2)配置
配置数据源
配置mybatis-plus
使用@MapperScan
1
2
3
4
5
6
7
8
9
10
11
|
@MapperScan("com.zlw.gulimall.product.dao")
@SpringBootApplication
public class GulimallProductApplication {
public static void main(String[] args) {
SpringApplication.run(GulimallProductApplication.class, args);
}
}
|
告诉MyBatis-Plus,sql映射文件位置
1
2
3
4
5
| mybatis-plus:
mapper-locations: classpath:/mapper
|
1
2
3
4
5
6
7
8
9
10
11
12
13
14
15
16
17
18
19
20
21
| 测试
先通过下面方法给数据库添加内容
@SpringBootTest(classes = GulimallProductApplication.class)
@RunWith(SpringRunner.class)
public class GulimallProductApplicationTests {
@Autowired
BrandService brandService;
@Test
public void contextLoads() {
BrandEntity brandEntity = new BrandEntity();
brandEntity.setDescript("hello");
brandEntity.setName("华为");
brandService.save(brandEntity);
System.out.println("保存成功");
}
}
|
这里要修改一下SpringCloud的版本,要不会发生错误,这个地方困扰了好久!
将所有模块的逆向工程补全
(1)首先修改代码生成器(也就是renren-generator):application.yml中数据库的名字
(2)修改generator.propertise中:模块名(moudleName)和表前缀(tablePrefix)
(3)执行renren-generator程序,生成main代码,替换对应微服务中的main。
(4)依赖common。配置application.yml,配置端口。
(5)运行测试