SpringBoot 特性
简介:
Spring Boot 框架对此开发过程进行了革命性的颠覆,完全抛弃了繁琐的 xml 配置过程,采用大量的默认配置简化我们的开发过程。
特性
- 能够快速创建基于 Spring 的应用程序
- 能够直接使用 java main 方法启动内嵌的 Tomcat 服务器运行 Spring Boot 程序,不需要部署 war 包文件
- 提供约定的 starter POM 来简化 Maven 配置,让 Maven 的配置变得简单
- 自动化配置,根据项目的 Maven 依赖配置, Spring boot 自动配置 Spring、 Spring mvc等
- 提供了程序的健康检查等功能
- 基本可以完全不使用 XML 配置文件,采用注解配置
SpringBoot入门案例
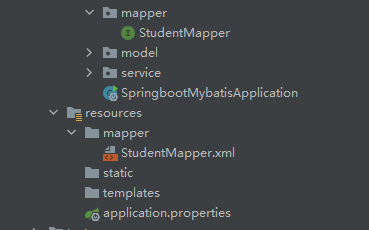
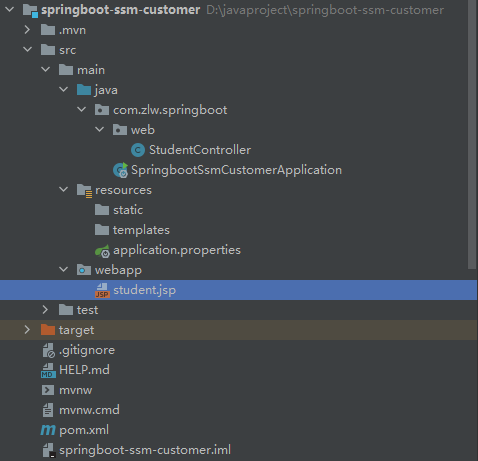
项目结构
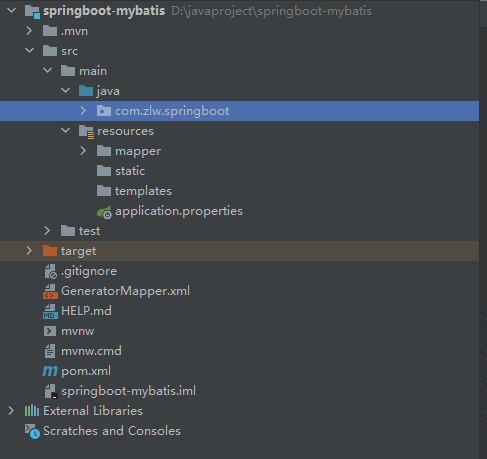
static: 存放静态资源,如图片、 CSS、 JavaScript 等
templates:存放 Web 页面的模板文件
application.properties/application.yml 用于存放程序的各种依赖模块的配置信息,比如 服务端口,数据库连接配置等
pom.xml配置文件解读
1
2
3
4
5
6
7
8
9
10
11
12
13
14
15
16
17
18
19
20
21
22
23
24
25
26
27
28
29
30
31
32
33
34
35
36
37
38
39
40
41
42
43
44
45
46
47
48
49
50
51
52
53
54
55
56
57
58
59
60
61
62
63
64
65
66
67
68
69
70
71
72
73
74
75
76
77
78
79
80
81
82
83
84
85
86
87
88
89
90
91
92
93
94
95
96
97
98
| <?xml version="1.0" encoding="UTF-8"?>
<project xmlns="http://maven.apache.org/POM/4.0.0" xmlns:xsi="http://www.w3.org/2001/XMLSchema-instance"
xsi:schemaLocation="http://maven.apache.org/POM/4.0.0 https://maven.apache.org/xsd/maven-4.0.0.xsd">
<modelVersion>4.0.0</modelVersion>
<parent>
<groupId>org.springframework.boot</groupId>
<artifactId>spring-boot-starter-parent</artifactId>
<version>2.7.0</version>
<relativePath/>
</parent>
<groupId>com.zlw.springboot</groupId>
<artifactId>springboot-mybatis</artifactId>
<version>0.0.1-SNAPSHOT</version>
{}
<properties>
<java.version>17</java.version>
</properties>
<dependencies>
<dependency>
<groupId>org.springframework.boot</groupId>
<artifactId>spring-boot-starter-web</artifactId>
</dependency>
<dependency>
<groupId>org.springframework.boot</groupId>
<artifactId>spring-boot-starter-test</artifactId>
<scope>test</scope>
</dependency>
<dependency>
<groupId>org.mybatis.spring.boot</groupId>
<artifactId>mybatis-spring-boot-starter</artifactId>
<version>2.0.0</version>
</dependency>
<dependency>
<groupId>mysql</groupId>
<artifactId>mysql-connector-java</artifactId>
</dependency>
<dependency>
<groupId>org.xmlunit</groupId>
<artifactId>xmlunit-core</artifactId>
</dependency>
</dependencies>
<build>
<resources>
<resource>
<directory>src/main/java</directory>
<includes>
<include>**/*.xml</include>
</includes>
</resource>
</resources>
<plugins>
<plugin>
<groupId>org.springframework.boot</groupId>
<artifactId>spring-boot-maven-plugin</artifactId>
</plugin>
<plugin>
<groupId>org.mybatis.generator</groupId>
<artifactId>mybatis-generator-maven-plugin</artifactId>
<version>1.3.6</version>
<configuration>
<configurationFile>GeneratorMapper.xml</configurationFile>
<verbose>true</verbose>
<overwrite>true</overwrite>
</configuration>
</plugin>
<plugin>
<groupId>org.apache.maven.plugins</groupId>
<artifactId>maven-compiler-plugin</artifactId>
<configuration>
<source>16</source>
<target>16</target>
</configuration>
</plugin>
</plugins>
</build>
</project>
|
Application.java: SpringBoot 程序执行的入口,执行该程序中的 main 方法, SpringBoot就启动了
1
2
3
4
5
6
7
8
9
10
| @SpringBootApplication
@MapperScan("com.zlw.springboot.mapper")
public class SpringbootMybatisApplication {
public static void main(String[] args) {
SpringApplication.run(SpringbootMybatisApplication.class, args);
}
}
|
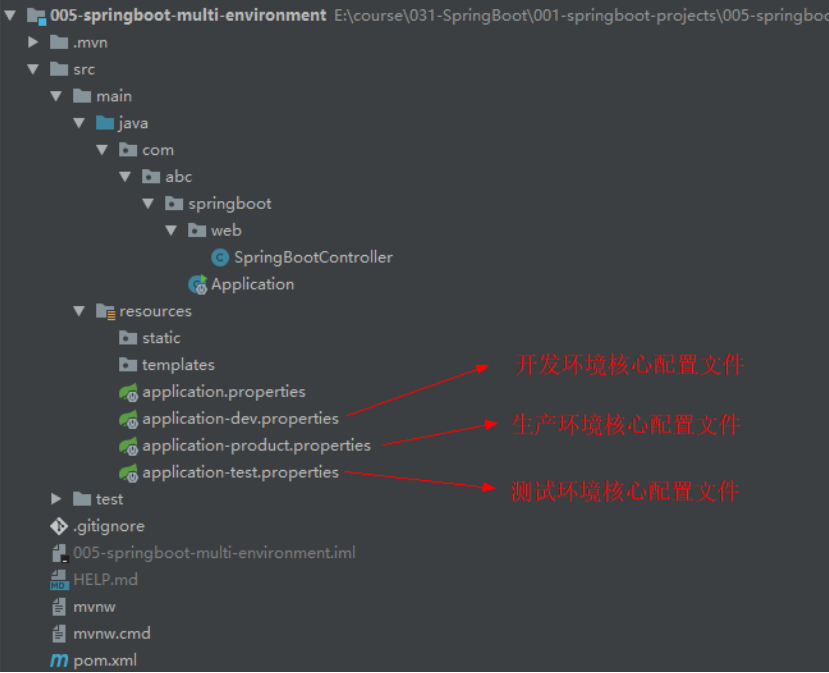
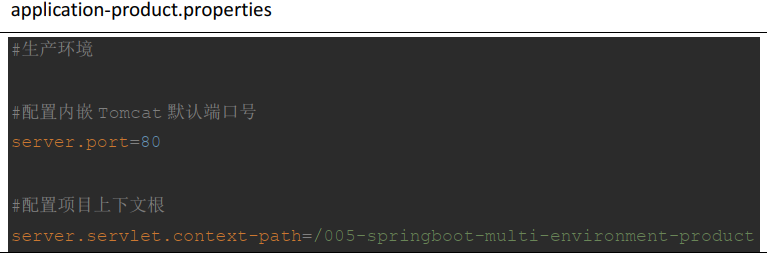
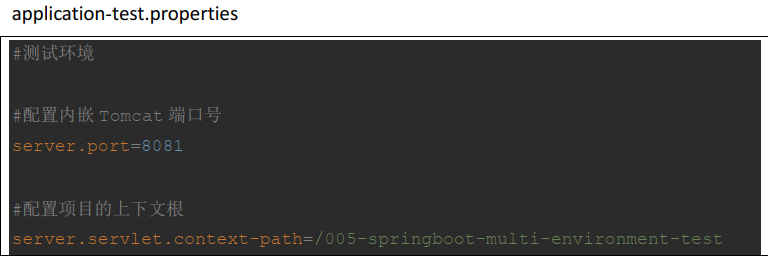
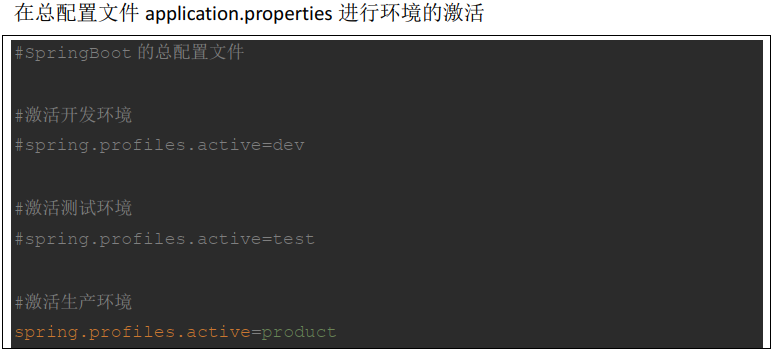
多环境配置
在实际开发的过程中,我们的项目会经历很多的阶段(开发->测试->上线),每个阶段的配置也会不同,例如:端口、上下文根、数据库等,那么这个时候为了方便在不同的环境之间切换, SpringBoot 提供了多环境配置,具体步骤如下
自定义配置
(1)在 SpringBoot 的核心配置文件中,除了使用内置的配置项之外,我们还可以在自定义配置,然后采用如下注解去读取配置的属性值
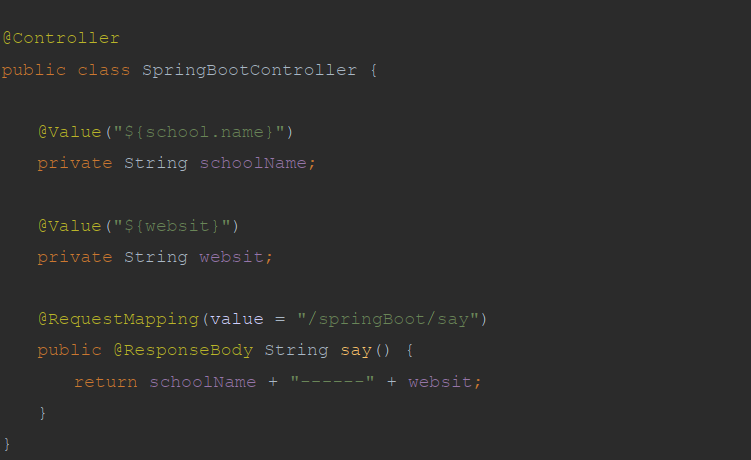
使用注解@Value
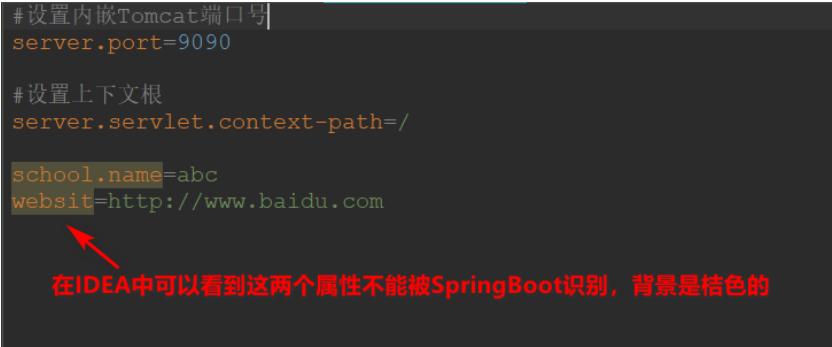
Java代码中要使用配置文件中的自定义配置:(@Value注解(”${}”))
(2)将整个文件映射成一个对象,用于自定义配置项比较多的情况
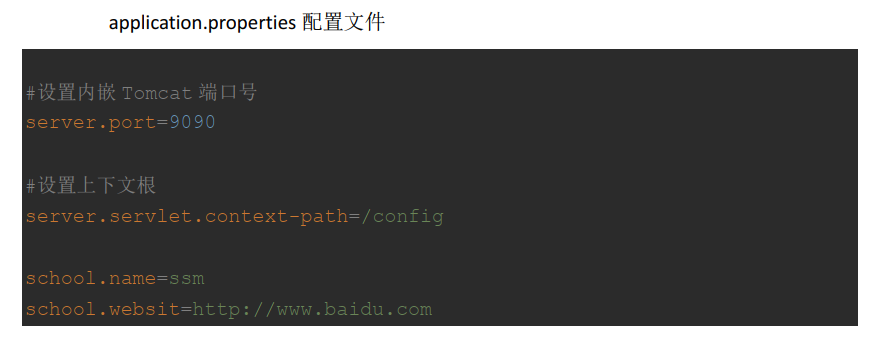
school映射的是一个java类,里面有name和websit属性,因为配置文件中不一定只有一个name和websit,所以要加上前缀名,
在 com.abc.springboot.config 包下创建 ConfigInfo 类,并为该类加上 Component 和ConfigurationProperties 注解,并在ConfigurationProperties 注解中添加属性prefix
school类上面要添加如下:

SpringBoot框架Web开发
Spring Boot 集成 MyBatis
(1)添加MyBatis 整合 SpringBoot 的起步依赖和MySQL 的驱动依赖
1
2
3
4
5
6
7
8
9
10
11
| <!--MyBatis 整合 SpringBoot 的起步依赖-->
<dependency>
<groupId>org.mybatis.spring.boot</groupId>
<artifactId>mybatis-spring-boot-starter</artifactId>
<version>2.0.0</version>
</dependency>
<!--MySQL 的驱动依赖-->
<dependency>
<groupId>mysql</groupId>
<artifactId>mysql-connector-java</artifactId>
</dependency>
|
(2)配置核心文件(application.properties )
1
2
3
4
| spring.datasource.driver-class-name=com.mysql.cj.jdbc.Driver
spring.datasource.url=jdbc:mysql:
spring.datasource.username=root
spring.datasource.password=Zlw0502
|
(3)Mybatis逆向生成(mapper.java 和 mapper.xml):
(1)引入逆向生成插件
1
2
3
4
5
6
7
8
9
10
11
12
|
<plugin>
<groupId>org.mybatis.generator</groupId>
<artifactId>mybatis-generator-maven-plugin</artifactId>
<version>1.3.6</version>
<configuration>
<configurationFile>GeneratorMapper.xml</configurationFile>
<verbose>true</verbose>
<overwrite>true</overwrite>
</configuration>
</plugin>
|
注意:SpringBoot集成Mybatis时,最重要的两个注解,@Mapper 和 @MapperScan
关于Mapper映射文件存放的位置写法有两种:
1
2
| #第二种方式:指定MyBatis映射文件的路径
mybatis-plus.mapper-locations=classpath:mapper
|
逆向工程所需要的配置文件:(GeneratorMapper.xml )
1
2
3
4
5
6
7
8
9
10
11
12
13
14
15
16
17
18
19
20
21
22
23
24
25
26
27
28
29
30
31
32
33
34
35
36
37
38
39
40
41
42
43
44
45
46
| <?xml version="1.0" encoding="UTF-8"?>
<!DOCTYPE generatorConfiguration
PUBLIC "-//mybatis.org//DTD MyBatis Generator Configuration
1.0//EN" "http://mybatis.org/dtd/mybatis-generator-config_1_0.dtd">
<generatorConfiguration>
<!-- 指定连接数据库的 JDBC 驱动包所在位置,指定到你本机的完整路径 -->
<classPathEntry location="E:\java_jar\mysql-connector-java-8.0.26\mysql-connector-java-8.0.26.jar"/>
<!-- 配置 table 表信息内容体, targetRuntime 指定采用 MyBatis3 的版本 -->
<context id="tables" targetRuntime="MyBatis3">
<!-- 抑制生成注释,由于生成的注释都是英文的,可以不让它生成 -->
<commentGenerator>
<property name="suppressAllComments" value="true"/>
</commentGenerator>
<!-- 配置数据库连接信息 -->
<jdbcConnection driverClass="com.mysql.jdbc.Driver"
connectionURL="jdbc:mysql://localhost:3306/springboot"
userId="root"
password="Zlw0502">
</jdbcConnection>
<!-- 生成 model 类, targetPackage 指定 model 类的包名, targetProject
指定生成的 model 放在 eclipse 的哪个工程下面-->
<javaModelGenerator targetPackage="com.zlw.springboot.model"
targetProject="src\main\java">
<property name="enableSubPackages" value="false"/>
<property name="trimStrings" value="false"/>
</javaModelGenerator>
<!-- 生成 MyBatis 的 Mapper.xml 文件, targetPackage 指定 mapper.xml 文
件的包名, targetProject 指定生成的 mapper.xml 放在 eclipse 的哪个工程下面 -->
<sqlMapGenerator targetPackage="com.zlw.springboot.mapper"
targetProject="src/main/java">
<property name="enableSubPackages" value="false"/>
</sqlMapGenerator>
<!-- 生成 MyBatis 的 Mapper 接口类文件,targetPackage 指定 Mapper 接口类
的包名, targetProject 指定生成的 Mapper 接口放在 eclipse 的哪个工程下面 -->
<javaClientGenerator type="XMLMAPPER" targetPackage="com.zlw.springboot.mapper" targetProject="src/main/java">
<property name="enableSubPackages" value="false"/>
</javaClientGenerator>
<!-- 数据库表名及对应的 Java 模型类名 -->
<table tableName="t_student" domainObjectName="Student"
enableCountByExample="false"
enableUpdateByExample="false"
enableDeleteByExample="false"
enableSelectByExample="false"
selectByExampleQueryId="false"/>
</context>
</generatorConfiguration>
|
Spring Boot 事务支持
只需要在访问数据库的Service方法上添加@Transactional即可,会自动进行回滚。
哪种方法需要,就在哪种方法上加@Transactional注解。(一般是增删改)
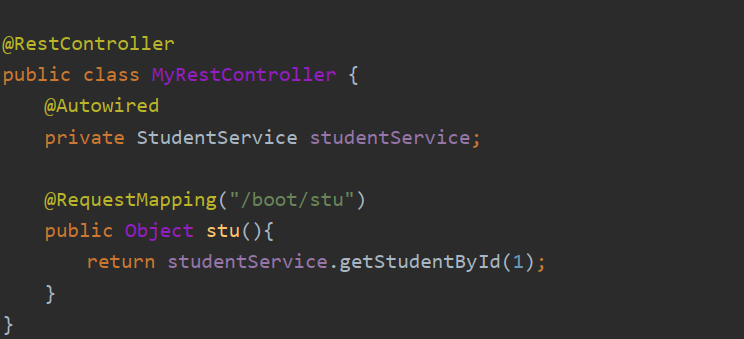
Spring Boot 下的 Spring MVC
Spring Boot 下的 Spring MVC 和之前的 Spring MVC 使用是完全一样的,主要有以下注解
@RestController
是@Controller 注解功能的增强 ,是 @Controller 与@ResponseBody 的组合注解
如果一个 Controller 类添加了@RestController,那么该 Controller 类下的所有方法都相当于添加了@ResponseBody 注解 ,也就说明了,这个Controller类中的所有方法返回的都是json字符串的格式。
@GetMapping
只支持 Get 请求, Get 请求主要用于查询操作
1
2
| @RequestMapping(value = "/user",method = RequestMethod.GET)
@GetMapping(value = "/user")
|
@PostMapping
只支持 Post 请求 Post 请求主要用户新增数据
1
2
| @RequestMapping(value = "/user",method = RequestMethod.POST)
@PostMapping(value = "/user")
|
@PutMapping
只支持 Put 请求 Put 通常用于修改数据
1
2
| @RequestMapping(value = "/user",method = RequestMethod.PUT)
@PutMapping(value = "/user")
|
@DeleteMapping
只支持 Delete 请求 通常用于删除数据
1
2
| @RequestMapping(value = "/user",method = RequestMethod.DELETE)
@DeleteMapping(value = "/user")
|
Spring Boot 开发 RESTFul
将请求参数使用 / 来隔开
Spring boot 开发 RESTFul 主要是几个注解实现
1
2
3
4
5
6
7
8
9
10
11
12
13
14
15
16
17
18
19
20
21
22
23
24
25
26
27
28
29
30
31
32
33
34
35
36
37
38
39
40
41
42
43
44
45
46
| public class RESTfulController {
@PostMapping(value = "/springBoot/student/{name}/{age}")
public Object addStudent(@PathVariable("name") String name,@PathVariable("age") Integer age) {
Map<String,Object> retMap = new HashMap<String, Object>();
retMap.put("name",name);
retMap.put("age",age);
return retMap;
}
@DeleteMapping(value = "/springBoot/student/{id}")
public Object removeStudent(@PathVariable("id") Integer id) {
return "删除的学生 id 为: " + id;
}
@PutMapping(value = "/springBoot/student/{id}")
public Object modifyStudent(@PathVariable("id") Integer id) {
return "修改学生的 id 为" + id;
}
@GetMapping(value = "/springBoot/student/{id}")
public Object queryStudent(@PathVariable("id") Integer id) {
return "查询学生的 id 为" + id;
}
}
|
可以使用Postman 模拟发送请求,进行测试 。
好处:
- 传递参数变简单了
- 服务提供者对外只提供了一个接口服务,而不是传统的 CRUD 四个接口
当请求路径冲突时:
- 修改请求方式:可以通过(post添加,put修改,get查询,delete删除)进行标识
- 修改请求路径(例如:顺序)
RESTful 原则
- 增: post 请求、删: delete 请求、改 :put 请求、查 :get 请求
- 请求路径不要出现动词 eg: /boot/order/1021/1(推荐) /boot/queryOrder/1021/1(不推荐)
- 分页、排序等操作,不需要使用斜杠传参数 (一般传的参数如果不是数据库表的字段,可以不采用斜杠 )
Spring Boot 集成 Redis
先去学redis了。。。。。
回来了。。。
设计一个案例:向redis中存入值,和取值。
步骤
(1)引入SpringBoot集成Redis依赖
1
2
3
4
5
| <!-- 加载 spring boot redis 包 -->
<dependency>
<groupId>org.springframework.boot</groupId>
<artifactId>spring-boot-starter-data-redis</artifactId>
</dependency>
|
(2)SpringBoot核心配置文件,配置redis信息(application.properties)
1
2
3
| spring.redis.host=192.168.86.129
spring.redis.port=6379
spring.redis.password=Zlw199805
|
(3)开启redis

要想连接成功,要关闭防火墙!

(4)编写RedisController类
1
2
3
4
5
6
7
8
9
10
11
12
13
14
15
16
17
18
19
20
| @Controller
public class RedisController {
@Autowired
private RedisService redisService;
@RequestMapping("/put")
public @ResponseBody Object put(String key,String value){
redisService.putRedis(key,value);
return "成功加入";
}
@RequestMapping("/get")
public @ResponseBody Object get(){
String name = redisService.getRedis("name");
return "名字为:"+name;
}
}
|
(5)编写RedisService接口和实现类
1
2
3
4
5
6
7
8
9
10
11
12
13
14
15
16
17
18
| @Service
public class RedisServiceImpl implements RedisService {
@Autowired
private RedisTemplate<Object,Object> redisTemplate;
@Override
public void putRedis(String key, String value) {
redisTemplate.opsForValue().set(key,value);
}
@Override
public String getRedis(String name) {
String a = (String) redisTemplate.opsForValue().get(name);
return a;
}
}
|
Spring Boot 集成 Dubbo
步骤
(1)分别创建dubbo服务接口工程、服务提供者工程 和 消费者工程。

接口工程
因为接口工程里面不用web项目,所以只创建一个普通的maven工程就可以了。
创建service接口
1
2
3
4
5
6
| package service;
public interface StudentService {
Integer queryStudentCount();
}
|
服务提供者工程
(1)引入依赖
1
2
3
4
5
6
7
8
9
10
11
12
13
14
15
16
17
18
| <!--Dubbo 集成 SpringBoot 框架起步依赖-->
<dependency>
<groupId>com.alibaba.spring.boot</groupId>
<artifactId>dubbo-spring-boot-starter</artifactId>
<version>2.0.0</version>
</dependency>
<!--Zookeeper 客户端依赖-->
<dependency>
<groupId>com.101tec</groupId>
<artifactId>zkclient</artifactId>
<version>0.10</version>
</dependency>
<!--Dubbo 接口工程-->
<dependency>
<groupId>com.zlw.springboot</groupId>
<artifactId>springboot-dubbo-interface</artifactId>
<version>0.0.1-SNAPSHOT</version>
</dependency>
|
(2)核心配置文件
1
2
3
4
5
6
7
8
9
10
| server.port=8081
server.servlet.context-path=/
#设置dubbo的配置
spring.application.name=springboot-dubbo-providers
#设置当前工程是一个服务提供者
spring.dubbo.server=true
#设置注册中心
spring.dubbo.registry=zookeeper:
|
(3)StudentServiceImpl
1
2
3
4
5
6
7
8
9
10
11
12
13
14
| import com.alibaba.dubbo.config.annotation.Service;
import org.springframework.stereotype.Component;
import service.StudentService;
@Component
@Service(interfaceClass = StudentService.class, version = "1.0.0", timeout=1500)
public class StudentServiceImpl implements StudentService {
@Autowired
private StudentMapper studentMapper;
@Override
public Student queryStudent(Integer id) {
return studentMapper.selectByPrimaryKey(id);
}
}
|
消费者工程。
(1)引入依赖
1
2
3
4
5
6
7
8
9
10
11
12
13
14
15
16
17
18
| <!--Dubbo 集成 SpringBoot 框架起步依赖-->
<dependency>
<groupId>com.alibaba.spring.boot</groupId>
<artifactId>dubbo-spring-boot-starter</artifactId>
<version>2.0.0</version>
</dependency>
<!--Zookeeper 客户端依赖-->
<dependency>
<groupId>com.101tec</groupId>
<artifactId>zkclient</artifactId>
<version>0.10</version>
</dependency>
<!--Dubbo 接口工程-->
<dependency>
<groupId>com.zlw.springboot</groupId>
<artifactId>springboot-dubbo-interface</artifactId>
<version>0.0.1-SNAPSHOT</version>
</dependency>同上
|
(2)核心配置文件
1
2
3
4
5
6
7
8
9
| #设置内嵌Tomcat端口号
server.port=8080
server.servlet.context-path=/
#设置dubbo设置
spring.application.name=springboot-dubbo-consumers
#指定注册中心
spring.dubbo.registry=zookeeper:
|
(3)Controller
1
2
3
4
5
6
7
8
9
10
| @RestController
public class StudentController {
@Reference(interfaceClass = StudentService.class, version = "1.0.0", check = false)
private StudentService studentService;
@RequestMapping(value = "/student")
public Object queryStudent(Integer id) {
Student student = studentService.queryStudent(id);
return student;
}
}
|
在 SpringBoot 入口程序类上加开启 Dubbo 配置支持注解
1
2
3
4
5
6
7
| @SpringBootApplication
@EnableDubboConfiguration
public class Application {
public static void main(String[] args) {
SpringApplication.run(Application.class, args);
}
}
|
Springboot集成Dubbo,Redis,Mybatis,Spring,SpringMVC,jsp
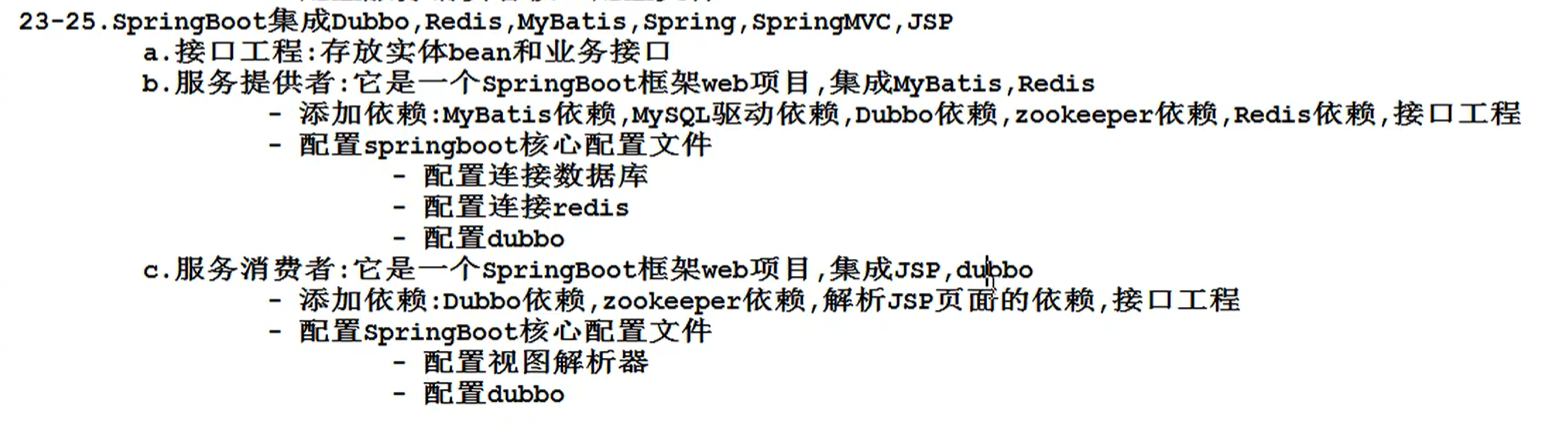
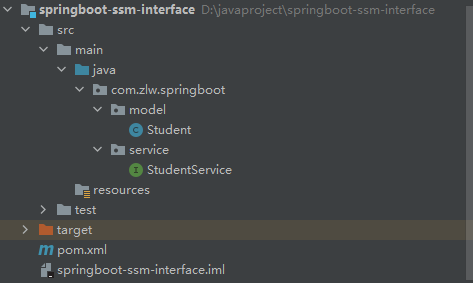
接口工程
创建一个简单的maven工程,什么都不用配置和依赖,里面存放的是接口和实体bean
使用mybatis逆向工程生成的bean,和StudentService接口
服务提供者
(1)提供依赖:Dubbo、zookeeper、redis、mybatis、mysql、接口工程
1
2
3
4
5
6
7
8
9
10
11
12
13
14
15
16
17
18
19
20
21
22
23
24
25
26
27
28
29
30
31
32
33
34
| <!-- dubbo集成springboot依赖-->
<dependency>
<groupId>com.alibaba.spring.boot</groupId>
<artifactId>dubbo-spring-boot-starter</artifactId>
<version>2.0.0</version>
</dependency>
<!--zookeeper 注册中心-->
<dependency>
<groupId>com.101tec</groupId>
<artifactId>zkclient</artifactId>
<version>0.10</version>
</dependency>
<!--mybatis-->
<dependency>
<groupId>org.mybatis.spring.boot</groupId>
<artifactId>mybatis-spring-boot-starter</artifactId>
<version>2.0.1</version>
</dependency>
<!--mysql数据库驱动-->
<dependency>
<groupId>mysql</groupId>
<artifactId>mysql-connector-java</artifactId>
</dependency>
<!-- 集成redis-->
<dependency>
<groupId>org.springframework.boot</groupId>
<artifactId>spring-boot-starter-data-redis</artifactId>
</dependency>
<!--接口工程-->
<dependency>
<groupId>com.zlw.springboot</groupId>
<artifactId>springboot-ssm-interface</artifactId>
<version>1.0.0</version>
</dependency>
|
mybatis逆向工程插件:
1
2
3
4
5
6
7
8
9
10
11
12
| <!--mybatis 代码自动生成插件-->
<plugin>
<groupId>org.mybatis.generator</groupId>
<artifactId>mybatis-generator-maven-plugin</artifactId>
<version>1.3.6</version>
<configuration>
<!--配置文件的位置-->
<configurationFile>GeneratorMapper.xml</configurationFile>
<verbose>true</verbose>
<overwrite>true</overwrite>
</configuration>
</plugin>
|
(2)配置文件
1
2
3
4
5
6
7
8
9
10
11
12
13
14
15
16
17
18
| server.port=8081
server.servlet.context-path=/
spring.application.name=springboot-ssm-provider
spring.dubbo.server=true
spring.dubbo.registry=zookeeper:
#mybatis核心配置
spring.datasource.driver-class-name=com.mysql.cj.jdbc.Driver
spring.datasource.url=jdbc:mysql:
spring.datasource.username=root
spring.datasource.password=Zlw0502
#redis
spring.redis.host=192.168.86.129
spring.redis.port=6379
spring.redis.password=Zlw199805
|
(3)使用mybatis逆向工程生成的mapper接口和mapper.xml文件,以及StudentServiceImpl.java

StudentServiceImpl.java
1
2
3
4
5
6
7
8
9
10
11
12
13
14
15
16
17
18
19
20
21
22
23
24
25
26
27
28
29
| @Component
@Service(interfaceClass = StudentService.class, version = "1.0.0", timeout=15000)
public class StudentServiceImpl implements StudentService{
@Autowired
private StudentMapper studentMapper;
@Autowired
private RedisTemplate<Object,Object> redisTemplate;
@Override
public Student queryDetail(Integer id) {
Student student = studentMapper.selectByPrimaryKey(id);
return student;
}
@Override
public Integer queryCount() {
Integer studentCount = (Integer) redisTemplate.opsForValue().get("studentCount");
if (studentCount==null){
int i = studentMapper.queryStudentCount();
redisTemplate.opsForValue().set("studentCount",i,30, TimeUnit.SECONDS);
return i;
}else {
return studentCount;
}
}
}
|
服务消费者
(1)配置依赖(Dubbo、zookeeper、jsp依赖、接口工程依赖)
1
2
3
4
5
6
7
8
9
10
11
12
13
14
15
16
17
18
19
20
21
22
23
24
| <dependency>
<groupId>com.alibaba.spring.boot</groupId>
<artifactId>dubbo-spring-boot-starter</artifactId>
<version>2.0.0</version>
</dependency>
<dependency>
<groupId>com.101tec</groupId>
<artifactId>zkclient</artifactId>
<version>0.10</version>
</dependency>
<!-- Springboot集成jsp,仅仅只是需要展示JSP页面需要添加解析jsp页面依赖-->
<dependency>
<groupId>org.apache.tomcat.embed</groupId>
<artifactId>tomcat-embed-jasper</artifactId>
</dependency>
<dependency>
<groupId>com.zlw.springboot</groupId>
<artifactId>springboot-ssm-interface</artifactId>
<version>1.0.0</version>
</dependency>
|
找到jsp文件的资源路径配置
1
2
3
4
5
6
7
8
9
| <resources>
<resource>
<directory>src/main/webapp</directory>
<targetPath>META-INF/resources</targetPath>
<includes>
<include>*.*</include>
</includes>
</resource>
</resources>
|
(2)配置核心配置文件
1
2
3
4
5
6
7
8
9
10
11
12
13
14
15
|
server.port=8080
server.servlet.context-path=/
spring.application.name=springboot-ssm-customer
spring.dubbo.registry=zookeeper:
#配置视图解析器
spring.mvc.view.prefix=/
spring.mvc.view.suffix=.jsp
#设置请求响应的字符编码
server.servlet.encoding.enabled=true
server.servlet.encoding.force=true
server.servlet.encoding.charset=UTF-8
|
(3)Contorller层和jsp文件
1
2
3
4
5
6
7
8
9
10
11
12
13
14
15
16
17
18
19
20
21
22
| @Controller
public class StudentController {
@Reference(interfaceClass = StudentService.class, version = "1.0.0", check = false)
private StudentService studentService;
@RequestMapping("/student/detail/{id}")
public String StudentDetail(Model model, @PathVariable("id") Integer id){
Student student = studentService.queryDetail(id);
model.addAttribute("student",student);
return "student";
}
@RequestMapping("/student/count")
public @ResponseBody Object StudentCount(){
Integer count = studentService.queryCount();
return count;
}
}
|
1
2
3
4
5
6
7
8
9
10
11
12
13
| <%@ page contentType="text/html;charset=UTF-8" language="java" %>
<html>
<head>
<title>学生信息</title>
</head>
<body>
<h3>学生编号为:${student.id}</h3>
<h3>学生姓名为:${student.name}</h3>
<h3>学生年龄为:${student.age}</h3>
</body>
</html>
|
springboot 非web应用程序(了解)
方式一
在 Application 类的 main 方法中,获取容器,调用业务 bean
1
2
3
4
5
6
7
8
9
10
11
12
13
14
15
16
17
18
| @SpringBootApplication
public class Application {
public static void main(String[] args) {
ConfigurableApplicationContext context =SpringApplication.run(Application.class, args);
UserService userService = (UserService) context.getBean("userServiceImpl");
String sayHello = userService.sayHello();
System.out.println(sayHello);
}
}
|
方式二
**实现 CommandLineRunner 接口 **
1
2
3
4
5
6
7
8
9
10
11
12
13
14
15
16
17
| @SpringBootApplication
public class Application2 implements CommandLineRunner {
@Autowired
private UserService userService;
public static void main(String[] args) {
SpringApplication.run(Application2.class,args);
}
@Override
public void run(String... args) throws Exception {
String sayHello = userService.sayHello();
System.out.println(sayHello);
}
}
|
SpringBoot使用拦截器
(1)创建拦截器类
1
2
3
4
5
6
7
8
9
10
11
12
13
14
15
16
17
18
19
20
21
22
23
24
| public class UserInterceptor implements HandlerInterceptor {
@Override
public boolean preHandle(HttpServletRequest request, HttpServletResponse response,Object handler) throws Exception {
System.out.println("--------编写拦截规则-------");
Integer code = (Integer) request.getSession().getAttribute("code");
if (null == code) {
response.sendRedirect(request.getContextPath() + "/user/error");
return false;
}
return true;
}
@Override
public void postHandle(HttpServletRequest request, HttpServletResponse response,
Object handler, ModelAndView modelAndView) throws Exception {
}
@Override
public void afterCompletion(HttpServletRequest request, HttpServletResponse response,
Object handler, Exception ex) throws Exception {
}
}
|
(2)@Configuration 定义配置类-拦截器
1
2
3
4
5
6
7
8
9
10
11
12
13
14
15
16
17
18
| @Configuration
public class InterceptorConfig implements WebMvcConfigurer {
@Override
public void addInterceptors(InterceptorRegistry registry) {
String[] addPathPatterns = {
"/user/**",
};
String[] excludePathPatterns = {
"/user/error",
"/user/verifyRealName"
};
registry.addInterceptor(new UserInterceptor())
.addPathPatterns(addPathPatterns)
.excludePathPatterns(excludePathPatterns);
}
}
|
Spring Boot 中使用 Servlet(了解)
方式一:通过注解扫描方式实现
(1)创建 MyServlet.class
1
2
3
4
5
6
7
8
9
10
11
12
13
| @WebServlet(urlPatterns = "/myServlet")
public class MyServlet extends HttpServlet {
@Override
protected void doGet(HttpServletRequest request, HttpServletResponse esponse) throws ServletException, IOException {
response.getWriter().print("My SpringBoot Servlet");
response.getWriter().flush();
response.getWriter().close();
}
@Override
protected void doPost(HttpServletRequest request, HttpServletResponse response) throws ServletException, IOException {
doGet(request,response);
}
}
|
**(2)在 主 应 用 程 序 Application 类 上 添 加@ServletComponentScan(“com.abc.springboot.servlet”) **
1
2
3
4
5
6
7
| @SpringBootApplication
@ServletComponentScan(basePackages = "com.abc.springboot.servlet")
public class Application {
public static void main(String[] args) {
SpringApplication.run(Application.class, args);
}
}
|
方式二:通过 SpringBoot 的配置类实现(组件注册)
(1)创建一个普通的 Servlet
1
2
3
4
5
6
7
8
9
10
11
12
| public class MyServlet extends HttpServlet {
@Override
protected void doGet(HttpServletRequest req, HttpServletResponse resp) throws ServletException, IOException {
resp.getWriter().print("Hello,SpringBoot Servlet!");
resp.getWriter().flush();
resp.getWriter().close();
}
@Override
protected void doPost(HttpServletRequest req, HttpServletResponse resp) throws ServletException, IOException {
doGet(req,resp);
}
}
|
(2)编写一个 Spring Boot 的配置类,在该类中注册 Servlet
1
2
3
4
5
6
7
8
9
10
11
12
13
14
15
16
| @Configuration
public class ServletConfig {
@Bean
public ServletRegistrationBean myServletRegistrationBean() {
ServletRegistrationBean servletRegistrationBean = new
ServletRegistrationBean(new MyServlet(), "/springboot/myServlet");
return servletRegistrationBean;
}
}
|
Spring Boot 中使用 Filter(了解)
方式一:通过注解方式实现
(1)通过注解方式创建一个 Filer
1
2
3
4
5
6
7
8
| @WebFilter(urlPatterns = "/springboot/myFilter")
public class MyFilter implements Filter {
@Override
public void doFilter(ServletRequest servletRequest, ServletResponse servletResponse,FilterChain filterChain) throws IOException, ServletException {
System.out.println("-------------您已进入过滤器---------------");
filterChain.doFilter(servletRequest,servletResponse);
}
}
|
(2)在 主 应 用 程 序 Application 类 上 添 加@ServletComponentScan(“basePackages = “com.abc.springboot.filter”)
1
2
3
4
5
6
7
| @ServletComponentScan(basePackages = "com.abc.springboot.filter")
@SpringBootApplication
public class Application {
public static void main(String[] args) {
SpringApplication.run(Application.class, args);
}
}
|
方式二 通过 Spring Boot 的配置类实现
(1)创建 MyFilter 类
1
2
3
4
5
6
7
| public class MyFilter implements Filter {
@Override
public void doFilter(ServletRequest servletRequest, ServletResponse servletResponse,FilterChain filterChain) throws IOException, ServletException {
System.out.println("---------------通过配置类注册过滤器-------------------");
filterChain.doFilter(servletRequest,servletResponse);
}
}
|
(2)编写一个 Spring Boot 的配置类,在该类中注册 Filter
1
2
3
4
5
6
7
8
9
10
11
| @Configuration
public class FilterConfig {
@Bean
public FilterRegistrationBean myFilterRegistration() {
FilterRegistrationBean filterRegistrationBean = new FilterRegistrationBean(new MyFilter());
filterRegistrationBean.addUrlPatterns("/springboot/*","/user/*");
return filterRegistrationBean;
}
}
|
Spring Boot 项目配置字符编码
响应到html页面的时候,中文会出现乱码,解决这个问题:
方式一:使用传统的 Spring 提供的字符编码过滤器
(1)创建一个 Servlet
1
2
3
4
5
6
7
8
9
10
11
12
13
14
| public class MyServlet extends HttpServlet {
@Override
protected void doGet(HttpServletRequest req, HttpServletResponse resp) throws ServletException, IOException {
resp.getWriter().print("Hello World,世界您好! ");
resp.setContentType("text/html;character=utf-8");
resp.getWriter().flush();
resp.getWriter().close();
}
@Override
protected void doPost(HttpServletRequest req, HttpServletResponse resp) throws ServletException, IOException {
doGet(req, resp);
}
}
|
(2)创建配置类 SystemConfig
1
2
3
4
5
6
7
8
9
10
11
12
13
14
15
16
17
18
19
20
21
22
23
24
25
26
27
28
29
| @Configuration
public class SystemConfig {
@Bean
public ServletRegistrationBean myServletRegistration() {
ServletRegistrationBean servletRegistrationBean = new ServletRegistrationBean(new MyServlet(),
"/springboot/myServlet");
return servletRegistrationBean;
}
@Bean
public FilterRegistrationBean characterFilterRegistration() {
web.xml 文件中
CharacterEncodingFilter characterEncodingFilter = new
CharacterEncodingFilter();
characterEncodingFilter.setForceEncoding(true);
characterEncodingFilter.setEncoding("UTF-8");
FilterRegistrationBean filterRegistrationBean = new
FilterRegistrationBean();
filterRegistrationBean.setFilter(characterEncodingFilter);
filterRegistrationBean.addUrlPatterns("/*");
return filterRegistrationBean;
}
}
|
(3)关闭 SpringBoot 的 http 字符编码支持
1
2
3
| #关闭 springboot 的 http 字符编码支持
#只有关闭该选项后, spring 字符编码过滤器才生效
spring.http.encoding.enabled=false
|
方式二 在 application.properties 中配置字符编码(推荐)
(1)SpringBoot 核心配置文件添加字符编码设置
1
2
3
4
| #设置请求响应的字符编码
server.servlet.encoding.enabled=true
server.servlet.encoding.force=true
server.servlet.encoding.charset=UTF-8
|
(2)创建 Servlet
1
2
3
4
5
6
7
8
9
10
11
12
13
| public class MyServlet extends HttpServlet {
@Override
protected void doGet(HttpServletRequest req, HttpServletResponse resp) throws ServletException, IOException {
resp.getWriter().print("Hello World!世界您真好! ");
resp.setContentType("text/html;character=utf-8");
resp.getWriter().flush();
resp.getWriter().close();
}
@Override
protected void doPost(HttpServletRequest req, HttpServletResponse resp) throws ServletException, IOException {
doGet(req, resp);
}
}
|
(3)创建配置类 ServletConfig
1
2
3
4
5
6
7
8
| @Configuration
public class ServletConfig {
@Bean
public ServletRegistrationBean myServletRegistration() {
ServletRegistrationBean servletRegistrationBean = new ServletRegistrationBean(new MyServlet(),"/myservlet");
return servletRegistrationBean;
}
}
|
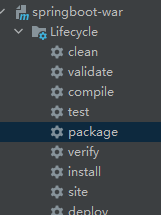
Springboot 打war包
(1)程序入口类需扩展继承 SpringBootServletInitializer类并覆盖 configure 方法
1
2
3
4
5
6
7
8
9
10
11
12
| @SpringBootApplication
public class Application extends SpringBootServletInitializer {
public static void main(String[] args) {
SpringApplication.run(Application.class, args);
}
@Override
protected SpringApplicationBuilder
configure(SpringApplicationBuilder builder) {
return builder.sources(Application.class);
}
}
|
(2)在 pom.xml 中添加(修改)打包方式为 war
1
| <packaging>war</packaging>
|
(3)在 pom.xml 中配置将配置文件编译到类路径
1
2
3
4
5
6
7
8
9
10
11
12
13
14
15
16
17
18
19
20
21
22
23
24
25
26
| <resource>
<!--源文件夹-->
<directory>src/main/webapp</directory>
<!--目标文件夹-->
<targetPath>META-INF/resources</targetPath>
<!--包含的文件-->
<includes>
<include>**
*.xml</include>
</includes>
</resource>
<!--src/main/resources 下的所有配置文件编译到 classes 下面去-->
<resource>
<directory>src/main/resources</directory>
<includes>
<include>**
|
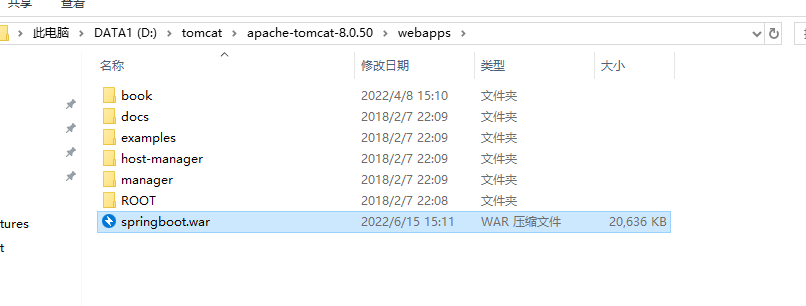
(4)在 pom.xml 的 build 标签下通过 finalName 指定打 war包的名字
1
2
|
<finalName>springboot</finalName>
|

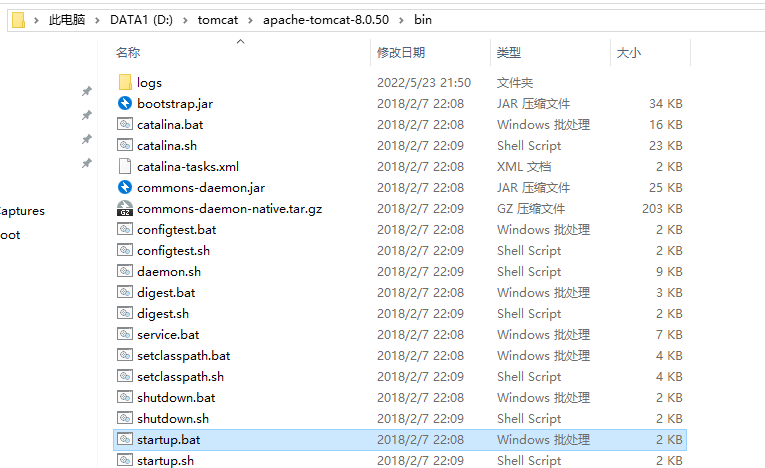
linux中也是同样的操作
Spring Boot 程序打 Jar 包与运行
在 pom.xml 文件中添加 resources 配置,以后为了保险起见,大家在打包的时候,建议把下面的配置都加上
1
2
3
4
5
6
7
8
9
10
11
12
13
14
15
16
17
18
19
20
21
22
23
24
25
26
| <resource>
<directory>src/main/webapp</directory>
<targetPath>META-INF/resources</targetPath>
<includes>
<include>**/*.*</include>
</includes>
</resource>
<resource>
<directory>src/main/java</directory>
<includes>
<include>**/*.xml</include>
</includes>
</resource>
<resource>
<directory>src/main/resources</directory>
<includes>
<include>**/*.*</include>
</includes>
</resource>
|
修改 pom.xml 文件中打包插件的版本
(默认 SpingBoot 提供的打包插件版本为 2.2.2.RELEASE,这个版本打的 jar 包 jsp 不能访问,我们这里修改为 1.4.2.RELEASE(其它版本测试都有问题) )
1
2
3
4
5
6
|
<plugin>
<groupId>org.springframework.boot</groupId>
<artifactId>spring-boot-maven-plugin</artifactId>
<version>1.4.2.RELEASE</version>
</plugin>
|
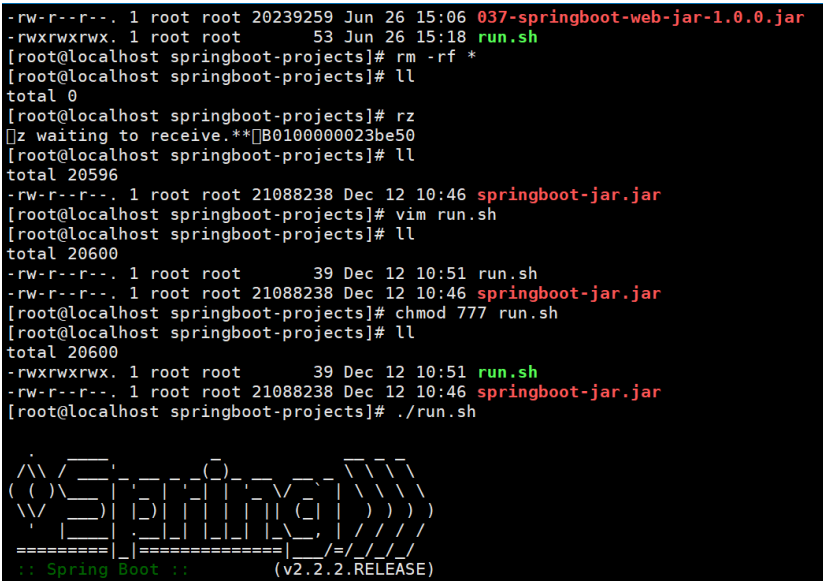
将jar包拷贝到一个目录,在该目录下面 执行jar包。

在linux中的运行:
(1)写一个 shell 脚本(run.sh):
1
2
| #!/bin/sh
java -jar xxx.jar
|
(2)赋权限 chmod 777 run.sh
(3)启动 shell 脚本: ./run.sh
SpringBoot 集成 logback 日志
(1)添加日志依赖
1
2
3
4
5
6
|
<dependency>
<groupId>org.projectlombok</groupId>
<artifactId>lombok</artifactId>
<version>1.18.2</version>
</dependency>
|
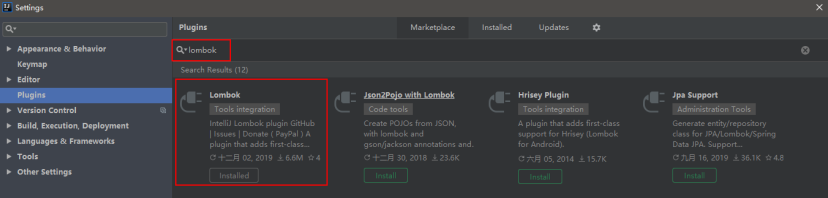
(2)添加 lombok 插件
(3)添加logback.xml 配置文件
1
2
3
4
5
6
7
8
9
10
11
12
13
14
15
16
17
18
19
20
21
22
23
24
25
26
27
28
29
30
31
32
33
34
35
36
37
| <?xml version="1.0" encoding="UTF-8"?>
<!-- 日志级别从低到高分为 TRACE < DEBUG < INFO < WARN < ERROR < FATAL,如果设置为 WARN,则低于 WARN 的信息都不会输出 -->
<!-- scan:当此属性设置为 true 时,配置文件如果发生改变,将会被重新加载,默认值为true -->
<!-- scanPeriod:设置监测配置文件是否有修改的时间间隔,如果没有给出时间单位,默认单位是毫秒。当 scan 为 true 时,此属性生效。默认的时间间隔为 1 分钟。 -->
<!-- debug:当此属性设置为 true 时,将打印出 logback 内部日志信息,实时查看 logback运行状态。默认值为 false。通常不打印 -->
<configuration scan="true" scanPeriod="10 seconds">
<!--输出到控制台-->
<appender name="CONSOLE" class="ch.qos.logback.core.ConsoleAppender">
<!--此日志 appender 是为开发使用,只配置最底级别,控制台输出的日志级别是大于或等于此级别的日志信息-->
<filter class="ch.qos.logback.classic.filter.ThresholdFilter">
<level>debug</level>
</filter>
<encoder>
<Pattern>%date [%-5p] [%thread] %logger{60} [%file : %line] %msg%n</Pattern>
<!-- 设置字符集 -->
<charset>UTF-8</charset>
</encoder>
</appender>
<appender name="FILE" class="ch.qos.logback.core.rolling.RollingFileAppender">
<!--<File>/home/log/stdout.log</File>-->
<File>E:/java-log/springboot</File>
<encoder>
<pattern>%date [%-5p] %thread %logger{60} [%file : %line] %msg%n</pattern>
</encoder>
<rollingPolicy class="ch.qos.logback.core.rolling.TimeBasedRollingPolicy">
<!-- 添加.gz 历史日志会启用压缩 大大缩小日志文件所占空间 -->
<!--<fileNamePattern>/home/log/stdout.log.%d{yyyy-MM-dd}.log</fileNamePattern>-->
<fileNamePattern>D:/log/stdout.log.%d{yyyy-MM-dd}.log</fileNamePattern>
<maxHistory>30</maxHistory><!-- 保留 30 天日志 -->
</rollingPolicy>
</appender>
<logger name="com.zlw.springboot.mapper" level="DEBUG" />
<root level="INFO">
<appender-ref ref="CONSOLE"/>
<appender-ref ref="FILE"/>
</root>
</configuration>
|
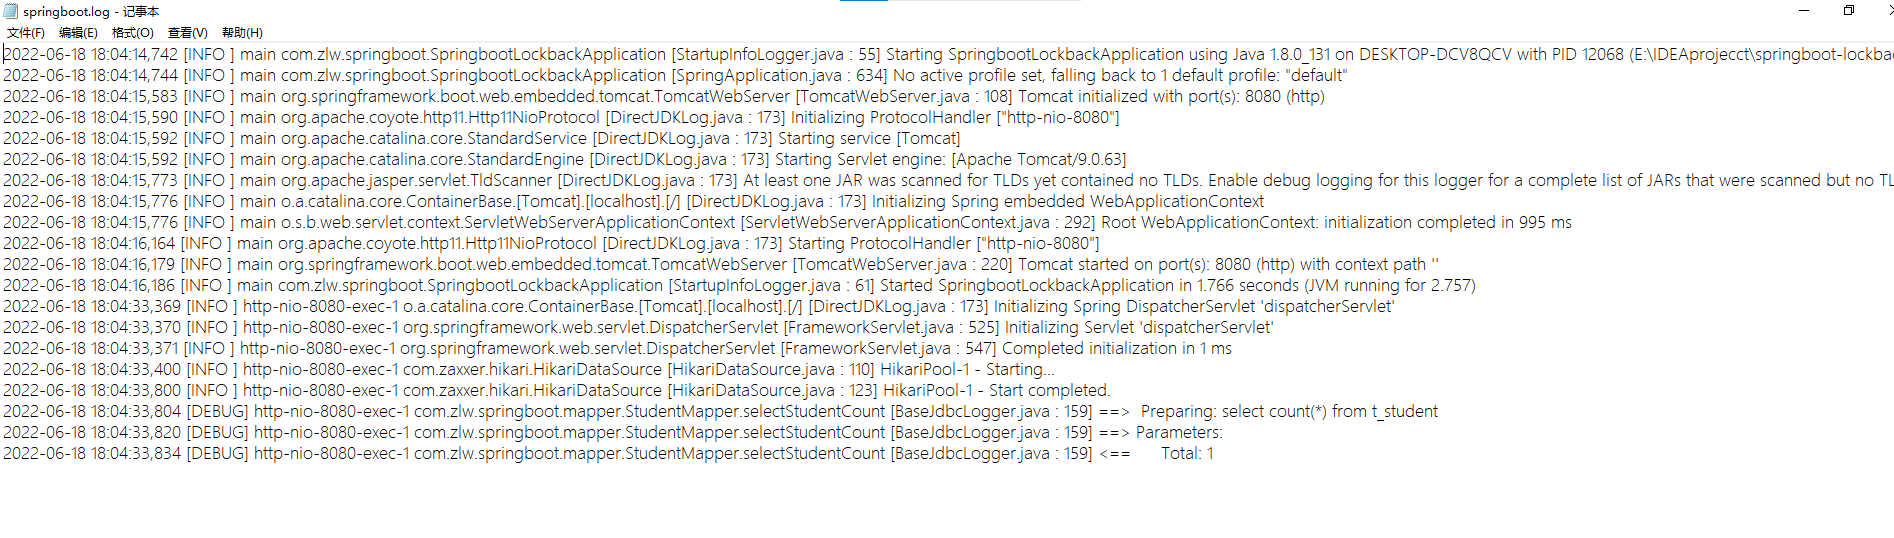
控制台的效果:

打印输出的log文件:
SpringBoot 集成 Thymeleaf 模板
它是基于 HTML 的,以 HTML 标签为载体,Thymeleaf 要寄托在 HTML 标签下实现。
在过去的 Java Web 开发中,我们往往会选择使用 Jsp 去完成页面的动态渲染, 但是 jsp 需要翻译编译运行,效率低
(1)创建springboot工程的时候,选择

(2)按照这种方式创建后, pom.xml 文件下会自动添加如下依赖
1
2
3
4
5
6
7
8
9
10
|
<dependency>
<groupId>org.springframework.boot</groupId>
<artifactId>spring-boot-starter-thymeleaf</artifactId>
</dependency>
<dependency>
<groupId>org.springframework.boot</groupId>
<artifactId>spring-boot-starter-web</artifactId>
</dependency>
|
(3)在 Spring boot 的核心配置文件 application.properties 中对Thymeleaf 进行配置
1
2
3
4
5
6
7
8
9
|
spring.thymeleaf.cache=false
前缀:
spring.thymeleaf.prefix=classpath:/templates/
后缀:
spring.thymeleaf.suffix=.html
|
(4)在src/main/resources 的 templates 下 创建html页面,
注意:要在html页面的开头加上:
1
| <html lang="en" xmlns:th="http://www.thymeleaf.org">
|
Thymeleaf表达式
标准表达式

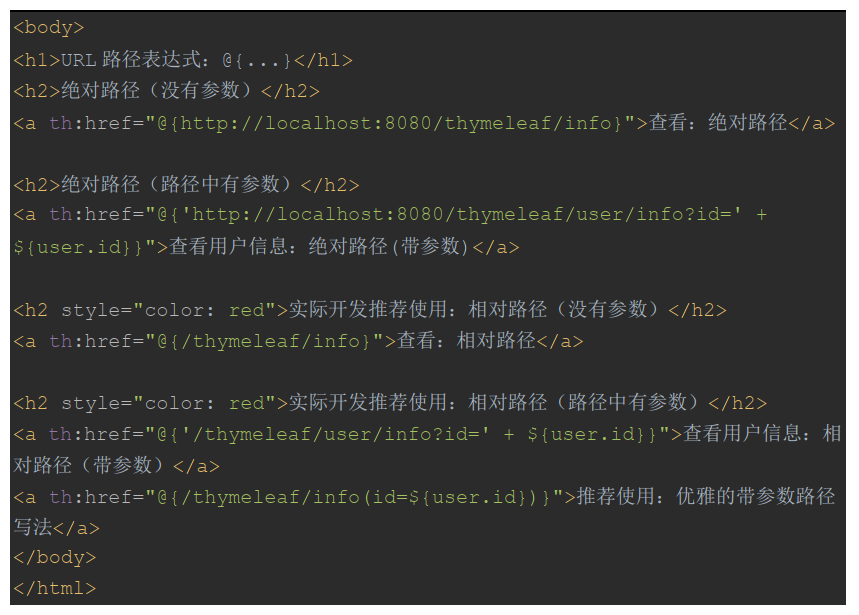
URL路径表达式
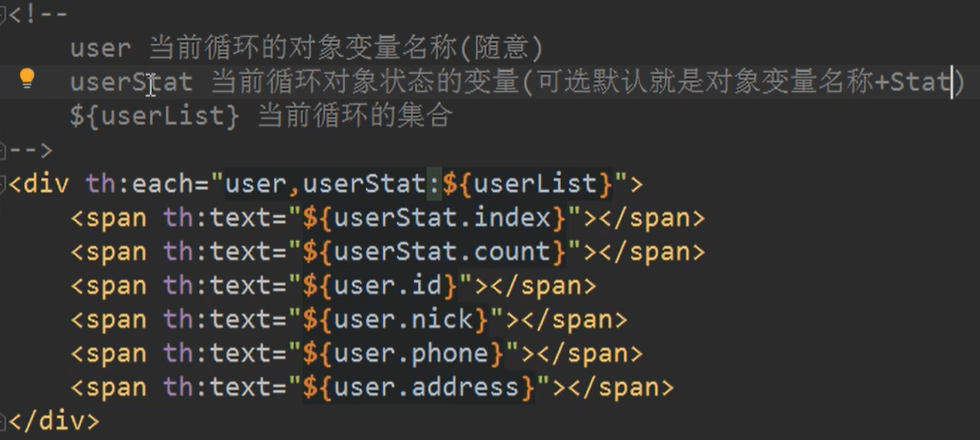
循环
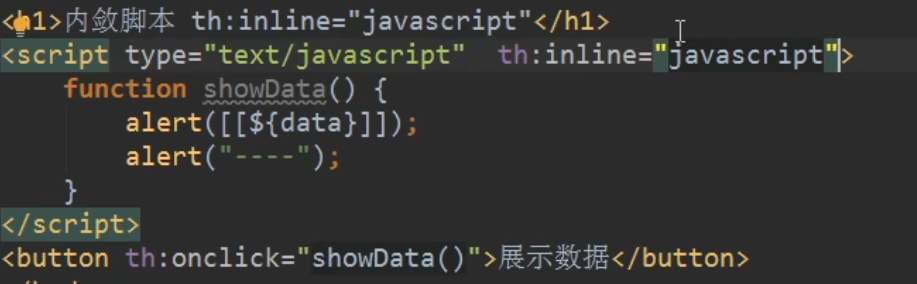
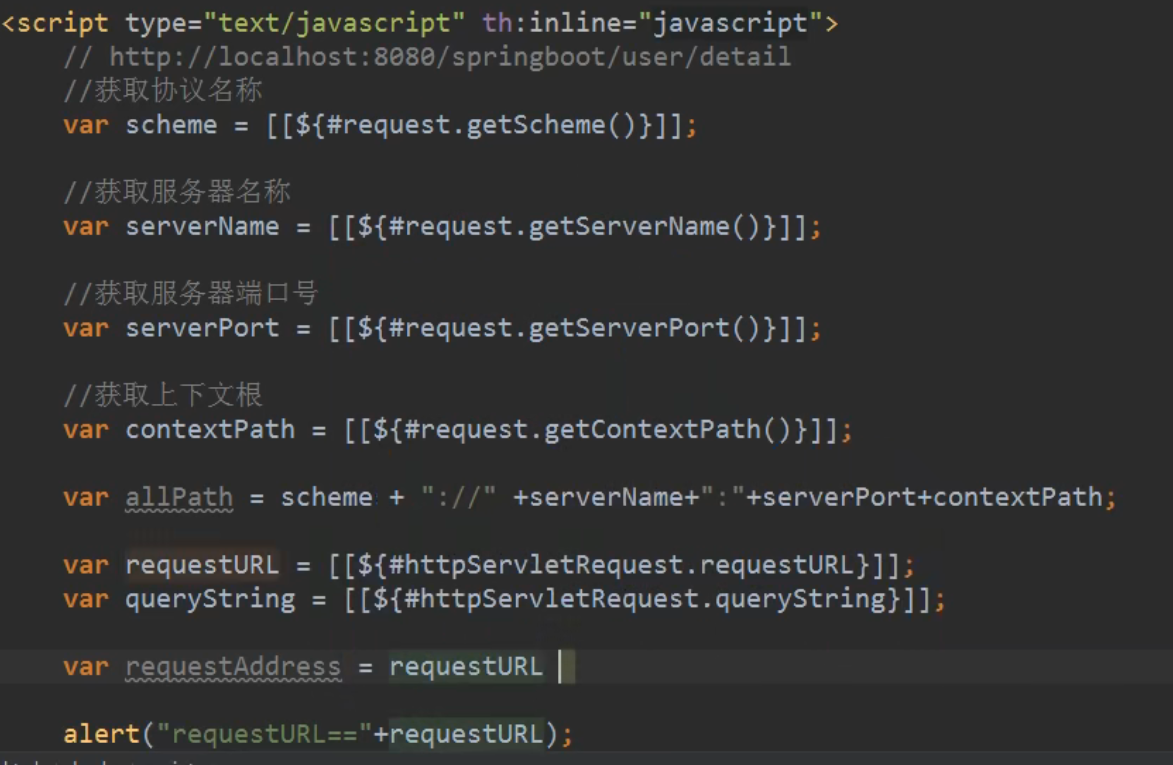
内敛脚本
字符串拼接

补充@Data
@Data注解放在类上面,并且加上配置文件的时候,在IDEA中下载插件lombok。定义的实体类可以不用实现,set和get方法,。
加上其中的配置文件:
1
2
3
4
| <dependency>
<groupId>org.projectlombok</groupId>
<artifactId>lombok</artifactId>
</dependency>
|
综合案例